
Follow the steps below to add choices to existing "picklists" in the CRM.
1. Go to Settings tab. Contact Viper Support if you do not see the Settings tab in your CRM.
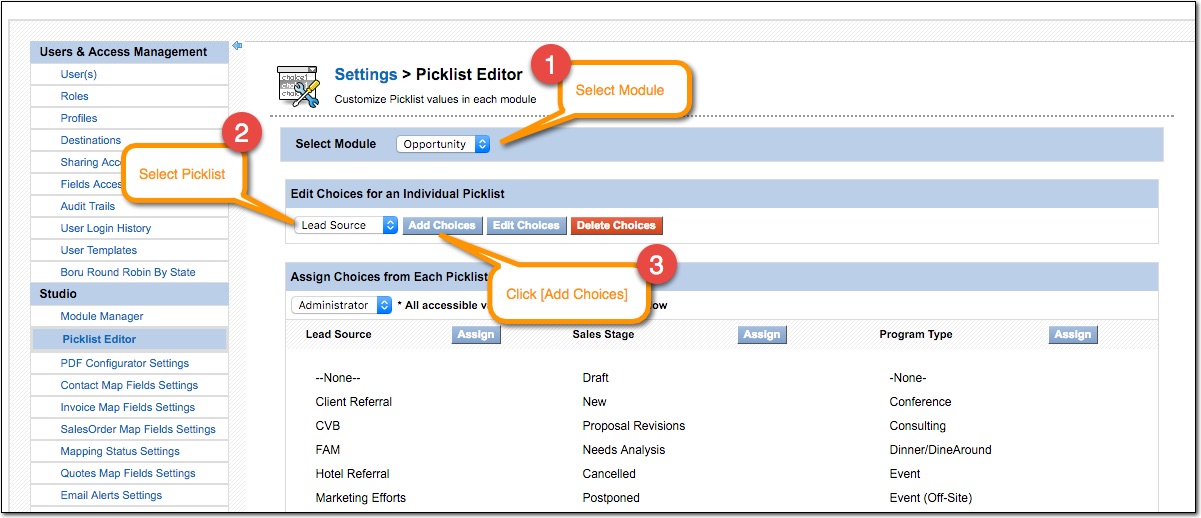
2. Open Picklist Editor.
3. In the Picklist editor, select the Module (leads, accounts, contacts, opportunities, etc.) that has the Picklist you want to modify, and then select the Picklist you want to modify. Click [Add Choices] button.
4. Begin adding new Picklist choices, with each choice on a new line. Before saving, be sure to add your new Picklist choices to ALL roles.

5. Click [Save]. After you see the "Success" dialog, click the [Done/Cancel] button. You will need to refresh the Picklist Editor page to see the new choices you added.
6. After adding new choices, you can reorder picklist choices to be in alphabetical order if you'd like. Click the [Assign] button for the Picklist you wish to modify.
7. In the popup window, use the up/down arrows to reorder Picklist choices. Before saving, be sure to add your new ordering to ALL roles.

8. When you've finished reordering choices, click [Save]. After you see the "Success" dialog, click the [Done/Cancel] button. You will need to refresh the Picklist Editor page to see the new ordering you applied.
Comments
0 comments
Please sign in to leave a comment.